Saturday, January 22, 2011

"What's the Matter, Colonel Sanders? Chicken????"*

When I was growing up, my parents often had dinner parties, but even when they had one extra person over for dinner, my dad delighted in making a special occasion out of the meal.
One of the dishes that I remember most vividly is lemon butt chicken.  Yes, I probably remember it because of the name.  It's a simple roasted chicken with lemons as the main accent, but for its simplicity, it can still wow an audience and at the same time be the epitome of comfort.
My dad generally cooked like I do - without following a set recipe.  I can't totally be certain if he followed the same procedure each time he and my mom made this dish.  So, instead of asking my mom what they did, I just went with what seemed right at the time.  There are MANY online recipes for a roasted chicken, some with low heat and some with extraordinarily high heat.  The important thing is to make sure the chicken is properly cooked through - not medium rare, as Scott likes to joke.

with a side of radish-turnip latkes

Lemon Butt Chicken

  • One whole roasting chicken (the fresher, more local, the better)
  • Two lemons, one zested
  • Thyme, chopped or leaves separated from stems
  • Kosher salt
  • Freshly cracked black pepper
  • 1/2 onion, roughly chopped
  • 1/2 stick butter (or compound butter - see below), softened

Preheat the oven to 425.
Make sure there isn't that gross bag of stuff inside the chicken's cavity.  If there is, feed it to the dog.  If there isn't, make sure the dog gets something else for dinner.
Rinse chicken, inside and out, and pat dry with paper towels.
Zest mixture
Combine the zest, thyme, salt, and pepper and rub the cavity of the chicken with the zest mixture.  You can also rub the skin of the chicken with any leftover mixture.
Apply the butter to the breast of the chicken underneath the skin.  You may need to cut the skin a little bit.  If you have leftover butter, you can place it inside the cavity or between the thigh and drumstick or the wings.
Stuff the cavity of the chicken with the onion and lemon.
Place any leftover onion and lemon into a roasting pan and place chicken on top (I put my chicken on a rack in the pan, but I still throw these in - the onions become GREAT snacking as the chicken rests).
The end result
Roast for approximately 90 minutes.  The chicken MUST reach an internal temperature of 180 when a thermometer is inserted between the thigh and the drumstick (I highly recommend a digital thermometer).
Remove from oven and let rest 10 minutes.
Carve and serve immediately.


Before mixing
Thyme Compound Butter

  • 1 stick butter (I prefer unsalted), softened
  • Thyme (to taste)

Mix the thyme and butter until the thyme is evenly distributed.  Spoon into sheet of waxed paper and roll into a log.  Refrigerate until needed; it can also be frozen when proper methods are used.

Of course, you could do this with any flavoring agent.  I will be making dill butter tomorrow with all the dill that we received this week. And I should probably make a garlic butter to have on hand just in case.


The lemon and the butter keep the chicken incredibly juicy.  What is great for our family, right now, at least, is that we can make two meals of this chicken.  I like dark meat, so I had a thigh and drumstick, and Scott had a breast.  The other half was saved, and the carcass will become the base for yet another delicious stock.
I wasn't able to eat chicken when I was pregnant.  I managed to have some fried stuff once (yeah, I know - super healthy, right?), but the thought of having roasted chicken would have turned me green.  I even tried to buy Scott some chicken at the store (he loves chicken, and even on my best day, I'm lukewarm on it), and I almost passed out over my cart trying to purchase it.  That I can roast a chicken AND have the desire to is, to me, a pretty big step, although I am not sure I am keen to do it again any time soon.
The weekend isn't over yet, and I have several new items on my culinary wish list, so hopefully I can squeeze a few more in!

*Quote from Mel Brooks's Spaceballs

Wednesday, January 19, 2011

Colonel Mustard... in the Kitchen... With the Blender

After my two failed attempts at the lemon marmalade, I thought I should give it a rest for a few days to regroup and find a recipe that might be more conducive to me (i.e., idiot-proof).
I needed something simple to get me through this week, and I noted in my last post that I decided to make my own mustard instead of turning the car around to get a jar at the store.
I wanted a basic mustard recipe, and no matter where I looked, a basic recipe seems to be the same anywhere.

Basic Mustard

  • equal parts water and vinegar (preferably apply cider vinegar, but I suppose most would do the trick)
  • another equal part mustard seeds (so I had a 1/2 cup seeds, 1/2 cup water, and 1/2 cup vinegar)

Combine these in a bowl and let them sit at room temperature 24-48 hours.

Pretty little seeds enjoying a nice, relaxing soak
After the allotted time has passed, puree the seed-vinegar mixture.

Now, I started out with our "baby" Cuisinart®, but the amount proved just a teeny bit too much, so I switched to the blender, a decision with which I was quite happy.

Once pureed, add spices/herbs/aromatics of your choosing.

I opted for some salt, freshly ground black pepper, cumin, and oregano.  I also added capers and some minced garlic.  No, I didn't measure, so I can't tell you the ratios.  Basically, I added whatever I felt was right.

The finished product is not the most photogenic thing I've ever made, but you know, beauty is only skin deep, and this was rather lovely in its own right.


This made about 3/4 pint, which should last just long enough.  When I tasted it, the mustard had quite the zing. This will mellow in the course of the next few days, but if it turns out to be too mild, I'll just throw in some hot sauce or something (I don't think I'll need to do that).
You know what this would really taste good on?  Homemade pastrami.

Monday, January 17, 2011

Cornundrum No More

I haven't forgotten about my lemon saga.  I just have been having some... technical difficulties with my marmalade, so there is some regrouping that needs to be done before I have enough for a full entry.
Good thing we had other food (foodie?) stuff going on this weekend!
Since getting his new smoker for Christmas, Scott has been all a-twitter about doing a brisket.  I really really really wanted him to let me corn it so it would become pastrami, but apparently someone doesn't want to be told how to use his toy.  
So, Texas brisket it was!
Scott won't fill me in on what he puts in his special rub, but there were some orange powders and some white ones, and I know that black pepper went into it, but that's about all I can give you.  If you have ever seen one of those BBQ cook-offs, you know how secretive people are about their rubs.  In the end, it didn't matter what went into it - the final product was all that was needed.
Then the brisket went into the smoker (8:45-ish) to absorb the mesquite goodness coming from below.  It had to cook to 185, but remember - smoking is a "low and slow" process - you don't want the meat to cook too quickly, as you won't get that lovely ring, and you'll likely end up with a rather tough offering on your plate.  This literally took all day, with Scott tending to it, adjusting the heat as needed (he's still figuring out all the bells and whistles) and adding more chips when the smoke showed signs of fading.

Just in from the smoker, having a bit of a rest.
Of course a brisket is a big ol' hunk of beef, as you might be able to tell from this pic of the finished product, so we invited his mom over for dinner (hosting other guests on Day 2 of potty training seems kind of uncool on several fronts, as there is a semi-clad toddler racing around).  She offered to bring dessert, so we took on everything else.
The main dish being under control, we looked not far at all for the veggie of the night - each week, when we pick up our amazing (half) share of Desert Root Farms veggies, we are greeted with a cheerful recipe attached to the bag, highlighting at least one of the goodies inside.
This week's recipe was clear evidence of kismet - we had all the ingredients (well, some were in the bag attached to the recipe, but we at least had them NOW).

Sauteed Turnips with Spinach
(courtesy the amazing people at Desert Root Farms)
  • 2 tablespoons olive oil
  • 1 clove garlic, minced
  • 3 medium turnips, peeled and cut into matchsticks
  • 1/2 cup raisins
  • 3 tablespoons freshly squeezed lemon juice
  • 10 ounces fresh spinach, coarsely chopped
  • freshly ground nutmeg, to taste
  • salt and pepper, to taste
Heat oil in saute pan over medium-high heat.  Add garlic, turnips, and raisons; cook about one minute.
Add lemon juice; cover and cook three minutes at medium heat.
Stir in the spinach and cook until just wilted.
Sprinkle with nutmeg, salt and pepper.

My modifications:
  • I used bacon fat instead of olive oil
  • We didn't have any raisins, so I used dried cranberries
  • We used only one turnip, but it was Gigantor, pictured below.
  • I don't think Scott peeled it, but I can't say.  I tend to not peel my root vegetables, as the skins offer many wonderful nutrients, and they often look pretty, too.
Now THAT is a turnip!
And not even the biggest one of the week, according to DRF's FB page!
And what else?  Scott suggested some green beans that I had picked up at the store, but those were for a different purpose (more on that in a sec...).  We decided on cornbread, but I rather blanched when he said he needed to run out to get some Jiffy® mix.  Don't get me wrong - that stuff (well, the blueberry muffin mix) got me through high school.  But if we are going to smoke our own brisket and use startingly fresh veggies, would a boxed mix really do the trick?
Rhetorical question - the answer is no.
My friend Katie, who is embarking on an amazing year-long adventure of homemade everything, recently posted a link to a skillet cornbread recipe that she made for dinner.  Excitedly, I scanned down the page and clicked the link - hey, if it takes you to a page that is called "olsouthrecipes," it's going to be the real thing.
Then, my heart sank -  I knew we didn't have enough corn meal for that recipe.
However, a short check through a search engine yielded a similar recipe but with smaller portion sizes.  I melded these two recipes, as I just could NOT in good conscience use shortening when we had bacon fat and butter, so the second recipe in and of itself was out.
Here is the final recipe that I came up with after modifying both recipes:

Skillet Cornbread
  • 1 cup cornmeal (I used yellow, but I'm sure white would be fine)
  • 1/2 cup AP flour
  • 1 tablespoon baking powder
  • 1/2 teaspoon salt
  • 1 cup buttermilk
  • 1/2 cup whole milk (I mean, you could use any milk, I suppose, but...)
  • 1 egg
  • 1/2 teaspoon baking soda
  • 1/4 cup butter, melted
  • 2 tablespoons (or so) bacon fat
Preheat the oven to 450.
In a large bowl, mix the cornmeal, flour, baking powder, and salt with a whisk.  Set aside.
In another bowl, mix the buttermilk and the milk with a whisk (you can use the same one).  Add the egg and stir (don't beat it like you are scrambling eggs; this is somewhat gentle work).  Stir in the baking soda in the same manner.
Pour the milk mixture into the cornmeal mixture and stir with the whisk until all the ingredients are just combined.
Slowly drizzle in the melted butter, stirring as you pour.
Melt the bacon fat in a cast iron skillet over medium-high heat.
Pour the batter into the skillet (you should hear sizzling) and cook for one minute on the stove top.
Place the skillet into the oven and cook for 15-20 minutes until crispy and golden.  Serve warm (or cold, or re-heated).
***I have read in several articles that you MUST use a cast iron skillet - anything else changes the taste. I honestly am not sure what else one would use, unless it was muffin tins, but then you wouldn't have cornbread, would you?  You'd have corn muffins.

Sizzling on the stove top - you can see the bacon fat bubbling up.
Just out of the oven - looks kind of like a giant pancake, doesn't it?
Remember that your skillet will bE SUPER HOT!  Use the little mitt thingies that came with it.
Now, let me be very clear here:  I really don't like cornbread.
Or so I thought.
I have always, ALWAYS put loads of butter and honey on my cornbread, even if it was sweet cornbread (which, according to certain experts... uh, family, that I have asked, is NOT southern cornbread) in the first place.  I was SURE that there was no other way to eat it, or, in my eyes, choke it down.  How else could I eat something THAT terribly dry?
But oh, mama, this cornbread...
This was amazing cornbread.  It was moist; it was fluffy; it was buttery.  In short, it was AMAZING.

Put all of this together, add some freshly squeezed lemonade (I used four of the five leftover lemons I mentioned in my last post), and you have a meal!


I was the only one who really liked the turnip dish, but I think that it's quite adaptable - you could really use any dark, leafy green or root vegetable in the place of the spinach and turnips (respectively).  I'm also quite certain that any dried fruit - or perhaps olives; I like olives - would be fine instead of the raisins.  I'm already thinking that it might be fun to add a dash of cumin next time; I find that is a great match to dried fruits in savory dishes.

I don't want to admit how little time elapsed between the full plate pic and this one.
There was definitely a "less talking - more eating" thing going on!
Now, the green beans I mentioned earlier had a special purpose.  I read that pickling brine can be "recycled" using pickling cucumbers once the original contents of the container have been consumed.  Of course, those aren't really in season at the moment, so I thought I would try to stuff some green beans (these are great in a bloody Mary, btw) into the jars that once housed my pickled okra (as of tonight, two of the jars have been demolished).
The first jar isn't quite ready - I stuffed them in there without doing anything to them but washing them and cutting them to size.
I'm hoping to speed up the process just a tick for the second jar; I parboiled this bunch before sending them into the briny depths.  Only time will tell, though.

Finally, I had a little "a-ha!" moment coming home from the store today (where I got WW flour instead of the AP that was on my list - derp!).  I realized that I had forgotten to get mustard, and we are completely out.  UGH!  We both really like mustard, although we tend to drift toward the "fancy schmancy" mustards instead of the yellow bottles (although I was mad about using the last of that, too).
Then I just told myself - we HAVE mustard seeds; I'll make it!
There we have it - I realized that making food from scratch, even condiments, is way more fun that getting it from the store.
Wait isn't that the intent of this blog?  For me to travel down the road of truly good eating, which means to put fewer ingredients - basically, only the pronounceable ingredients - in my mouth?  To come to enjoy making a meal, even if it's more elaborate to prepare or seemingly less healthy at first (I have used more bacon fat since starting this blog than I think I have in my life leading up to last fall)?  Well, yeah.
Epiphany?  No.  Just a realization that keeping tabs on myself and holding myself accountable is working.  I am eating less food but enjoying the collecting, preparing, and eating of it so much more than I ever thought I would.
The mustard seeds have to sit in their little bath until Wednesday, but I'm excitedly considering my spice options already.  Suggestions are welcome - just know that in the question the Pommes Frites street vendors of Regensburg often posed to me, "Süß oder scharf," I always choose scharf.

Saturday, January 15, 2011

When a Friend of Yours Gives You a Bazillion Lemons, Part I

We have often discussed, over dinner, the probability of tearing up the two ash trees in our backyard in order to plant ones that might be more useful than giving Scott an excuse to use the leaf blower.  We would LOVE to have citrus trees, although the type is always difficult to select (we don't have room to plant all the varieties we actually want), and certainly the quantity of any tree's offerings can often be staggering.
Thankfully, we have a friend who offered to give us some lemons, and we were only too happy to accept. 
Last week, we got a plastic grocery bag full, and when she said, "Do you want more?"  I said, "Sure!"  I  had visions of several lemony treats dancing in my head.  I love lemons for their versatility and the instant mood lift their color and fragrance gives me.
Well, today, that "more" arrived - in two large trash bags.
WOW, that is a LOT of lemons!
Let me back up for a moment.  If you search for lemon recipes, you will likely come across several that specify Meyer lemons.  The Meyer variety is NOT what grows in many Arizona backyards; in fact, Meyer lemons are illegal in the state of Arizona because it is known to harbor a disease that could devastate the citrus crop, one of the 4 C's that built this state.  No, the lemons that we have all over our house are the Lisbon, a smooth-skinned and sour lemon.
I have quite a list of items, to which I already plan to add, that I am planning on making or am in the process thereof:
  • lemon marmalade (this was tricky to find a recipe - most were Meyer lemon marmalades; note that the Meyer lemon CAN NOT be interchanged with any sour variety)
  • lemon extract - did you know that most "pure" extracts contain HFCS? (I'm also planning on making vanilla extract once I get myself to the store and buy some vanilla beans)
  • lemon sugar (also something of which I would like to have the vanilla variety)
  • lemon butt chicken - that's right - lemon. butt. chicken.
  • limoncello - gotta start it now so it's ready by the time the triple digits hit!

So, tonight, after a rather long Day 1 of potty training HRH, I decided to start tackling the list while Scott gave the princess her bath and put her to bed (I had taken Zooey on a run this afternoon, and it proved too hot for a black hound dog, but even though I had to cut it short for her, she was in NO mood - read "asleep" - to go for her usual evening walk/run).
First on the list: begin the marmalade.  


The recipe that I am using (link/recipe to be posted in Part II of this saga - I hope) adds no store-bought pectin, which is why I selected it.  One less item that I had to buy, and I'll be using the "bits" of the lemon instead - that means less waste!
After I sliced 7 lemons into pieces as thin as I could possibly slice without a mandoline (on my wish list for FOREVER), I placed them into water to soak overnight... good night, my pretties!


Once I put the slices in to rest, I turned my attention to the sugar.  Three cups of sugar and the zest of three lemons later (I think I should add that I am MADLY in love with my Microplane®), I have lemon sugar.
However, adding lemon zest to sugar does create moisture, and it's important to make sure that the moisture is completely gone before storing.  I spread my sugar in a pan, and in the morning, it should be dry enough to put in the crazily large canister that I purchased for this exact purpose (I didn't want to use too much sugar and not have enough for the marmalade tomorrow).


The last item of business for the night: lemon extract.  This was easy - equal parts vodka and filtered water, and the roughly chopped peel (no pith!) of one lemon per cup of liquid.
I made a pint of extract, so I used two lemons.


Of course, this is NOT going to be ready right away... sigh...  I hid it up in the cupboard above our refrigerator, although I am thinking that I need to move it, as I can already imagine my panic when I can't remember where I put it.


Now... I have five lemons, completely bereft of their skins/zest, sitting my my fridge, so I've got to get to the store to get myself a roaster.  And I guess I could make some lemon curd.  Or some lemonade.  Or some... well, looks like my list is going to start growing pretty darn fast.

Tuesday, January 11, 2011

Chard-Mander

I love all-in-one dishes!  They are so much easier to make and serve.  Since my dear husband got home late this evening, I flipped through several of my cookbooks, looking for something to use our veggies - first batch of 2011!! - but that was quick.  Then I decided just to look in the fridge and throw something together.  I'm getting better at this.


Greens-n-Bacon

  • Three rashers of streaky bacon, cut into 1/4 inch pieces
  • One-half red onion, chopped
  • Two tablespoons of minced garlic
  • Two very large bunches of Swiss chard (or two medium ones)
  • 1/2 cup of chicken stock 

Cook bacon is large pan at medium high heat until crispy.  Remove bacon from the pan with a slotted spoon, leaving the drippings.  Add onion and garlic; cook for two minutes.  Add the greens and toss to coat in the drippings.  Add the broth, cover, and simmer on medium heat until greens are completely wilted.  Add the bacon back to the pan and remove from heat.  Serve immediately.
Of course, the beauty of this recipe is that you can modify it in many ways.  It would be excellent with pancetta (my favorite).  If one wanted to have a vegetarian version, olive oil and vegetable broth could be substituted.  Instead of a red onion, a Walla Walla sweet or even a basic white one could be thrown in.  And naturally, any green could be used instead of the chard.  We actually had a medium bunch of chard and a bunch of some other leafy green that I couldn't identify, so I used those.
However, I really liked this version, since the saltiness of the onion and the sweetness of the red onion really melded together well with the chard and the bread, which we used to sop up every last bit of precious pot liquor.  Even though we do live in the Valley of the Sun, it's still nice to have a stash of cold-weather recipes for when the temps fall.

Who You Callin' a Shrimp?!? (or, Taking Stock)

Today HRH was at home with me, so I juggled too many various and sundry activities (all three computer screens were going at the same time for a while), but one project that I knew that I HAD to complete was making shrimp stock.
I kept the shells from Sunday's dinner just for this purpose, but you know what happens when any seafood product sits for too long - yuck!  I thawed out some frozen shells I had collected the past few times we had shrimp, too, so I had a good pile of shells with which to make a lovely starter for crab bisque or the ubiquitous chowdah!
While a chicken or turkey stock recipe generally calls for adding veggies into the water, I kept this one simple - shells and a wee bit of Tony Cachere's.  That's it.  I wanted the flavor to be really of the sea (or should I say, of the farm where these shrimp were raised?).
I was a little nervous - since I had HRH with me all by my lonesome AND I had to work (darn you, Power  Ball!), I wasn't able to monitor the kitchen every second, so if Zooey the Devil Dog left my sight, I worried that she was getting her doggie nose into that hot pot.  But she behaved herself for the most part, and after a few hours, I had a gorgeous gold stock of which any home cook should be proud.  I let it cool, strained out the shells, and placed into two freezer bags for later use
The thing I liked about this project is that once I'm through, I have used everything but the bag the shrimp came in.  This really is a benefit to sustainability.  The meat was, of course, eaten (there are a few that made it into the stock that shall be given to Zooey and Holden as a treat this evening).  The shells were used, but they can also be thrown into the compost - these are a great source of calcium (for the ground and for you, so if you ever eat a fried shrimp, pop the whole thing into your mouth!).  If I can just find a place that will wrap shrimp solely in paper, I will be set, as I can compost the paper, too, and I'll have a delicious, homemade meal that leaves literally no waste.  Win-win!

Sunday, January 9, 2011

Clase Para Hacer Tamales!!!!!!

I had been looking forward to this weekend for some time.  Early in December, our friend Cisco, who has been friends with Husband since they were 5 or 6, sent out an email that said (I'm paraphrasing, but it's pretty accurate), "Hey, my mom is coming to teach me how to make tamales - anyone else wanna join?"
Um, YES.  Yes, I do.
Like the penultimate student that I am, I showed up on time.  Early.  With a notepad to take copious notes.
I'm sorry - I can't share the recipe.  I was sworn to secrecy.
Actually, that's not true.  I'm just not sure that three pages of notes that is mostly no measuring and mentions of "to taste" will translate well.  The most important lesson I learned in the tamale-making process is that this, like many family recipes, is that it's all in the practicum, not the theory.  I can do my best, but really, if this is something that you are interested in adding to your repertoire, I recommend that you do what I did - get someone you know to tell and show you and make you get your hands messy.  And take notes; you will forget things, so take notes.
The tamales that we made are New Mexico style.  Of course, then, we started with the world-famous Hatch chiles.

When purchasing Hatch chiles, you can get mild, medium, or hot.  We used mild ; I think I'd like to try medium next time.  When broiled (and then boiled and then pureed), the chiles took on a sweet and fruity smell - delicious!

The hojas were already soaking when I got there; it's important, said Mama Connie, to buy the hojas that are in the plain plastic bags - no real label (of course, you will need to go to a Mexican market, but that's no problem, as El Rancho is just mere minutes away!

The hojas are soaked to get rid of any silk and dirt that may be left.

All right, here is where the tricky part came in - getting the right amount of masa and filling into the hojas.  We used a red pork butt for our filling (by "red," I mean the color of the chile - there is red chile, and there is green chile), but you can use darn near anything - chicken, beef, vegetables - there are even dessert tamales that are amazing.  The pork was so simple - it was thrown in the slow cooker overnight with just a touch of water (you could use broth, too, but this butt did NOT need it) and an onion that had been quartered.
Since the hojas can be various sizes, there isn't a "use a teaspoon of this or a tablespoon of that" here.  So, you have to get enough masa to coat the hoja, but not too much that you have barely any filling (no one eats the tamale for the masa), but also not too little so that the tamale doesn't "seal" when rolled.

Thanks to Vanna - I mean Dana, my hand model :)
Since we were all learners, we all did everything, from spooning the masa to rolling the tamale for steaming.  I think ideally it would be faster to have an assembly line approach - one person for the masa, one person for the filling (or one person per filling, if you have several), etc.  Several former students have told me that the assembly line process is the one that their moms, tias, and abuelitas follow, so I have to infer that it is tried and true.


We made about 7 dozen - not bad for 15 pounds of pork butt and 12 pounds of masa!  


Finally, it was time to steam.  We had a few pasta pots, but this can be done with just a few in a rice cooker, too.  It is this point at which a person can freeze the un-steamed tamales.  When it's time to cook them, they can be easily defrosted (in the fridge, people!) and then steamed.


OK, here is another difficult part for anyone who is theory-minded - there is no set time - you steam them until they are done.  You will KNOW that the tamale is done when the masa is firm - by firm I mean spongy, but it doesn't leave a dent when you press your finger into it (gently, of course - you are not searching for a pulse).  Mama Connie demonstrated how to test and showed us both done and un-done ones - you really can tell.


The tamales will steam for a while, and while we were forced to wait, we took some fresh tortillas and made burritos with the red pork that was left over.  That was pretty darn filling, but we managed to savor the fruits of our labors.

Steaming hot and muy delicioso!
Connie kept telling me to sprinkle a bit of cheese and a little more chile over it, but they were SO good "neat" that I didn't take the time.  My steps included only:
  1. Unwrap.
  2. Inhale.
  3. Repeat.
The best part of this class was that this was a take-home project I got to put IN the fridge instead of ON it!

A few things to add here:
  • There are three types of masa - we used the prepared, which made it ready to go one it was stirred.
  • We added some of the chile to the masa as well.  For dessert tamales, you could add cinnamon sugar, and there are even stores (like El Rancho) that sell dessert masa; it will have pineapple or other fruit already mixed in.
  • This is a messy process.  Cisco called me to tell me to bring an apron as well as the containers for leftovers.  If you like your kitchen pristine, don't make tamales.  But if you like tamales, suck it up, because it's worth it.
  • I mentioned that these are New Mexico style tamales.  There are also Sonoran style, which includes jalapeño strips and/or olives.  They are not bad, but this is the tamale I know and love.
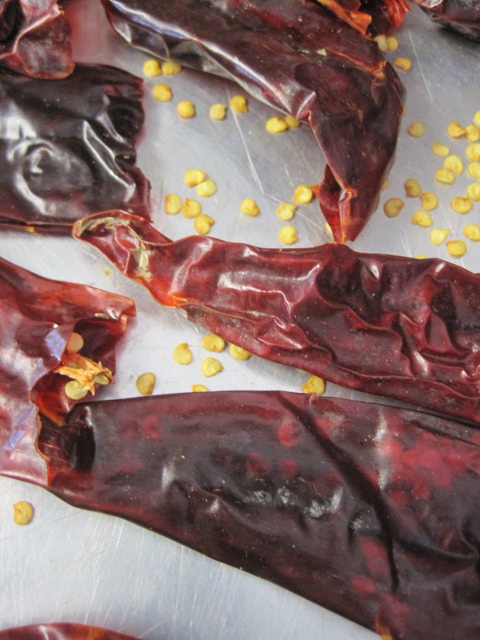
I am pleased to note that I also obtained several chiles with which I can make my own chile (sauce), thanks to Cisco.  I'm hoping to make it soon... I'm already upset about the thought of eating that last delicious tamale!
My most sincere thanks to Cisco and his entire family for a great day; I truly appreciate the opportunity to share the day with everyone and to be honored with this recipe.  I hope that I can do them all proud.
That night we had pulled pork - same cut of meat, but Scott broke in his new smoker, and we had Carolina barbecue.  By the end of Saturday, I was absolutely satiated with porky goodness.

Today, then, was NO PORK SUNDAY.  I had corned beef hash at Chompie's for breakfast instead.  It was amazing, just like everything is at Chompie's, and of course far too much, so I wasn't able to clean my plate.  I think, though, if I had, I would still be hating myself.  I didn't even need to eat lunch - that's how full I was.  I was sad, though, that because we were there for breakfast, we didn't get the plate of freshly made pickles.
Aside from being a pork-free zone day, it is also the day before my mother-in-law's birthday. This year, she requested that we make dinner, since we always make "fabulous" meals (only when she comes over - when no one is around, I'll eat a spoonful of peanut butter and chocolate syrup and call it dinner).
I was asked to serve shrimp or crab as well as asparagus, so of course, I looked for a shrimp and asparagus recipe.  I found this hot garlic shrimp and asparagus recipe from Cooking Light, but I made a few modifications (I know you are surprised):
  • One reviewer said she used artichoke hearts instead of asparagus, so I decided to try that.  I would do this again, but next time use at least one jar of the marinated hearts and use the oil to cook everything in order to add a touch more depth.
  • I didn't measure the garlic, but I'm pretty sure I used more than the allotted amount.  Same for the red pepper flakes.
The asparagus was actually a side - it was roasted with a little olive oil and S&P, and then I drizzled a pecan brown butter over it right before serving.
The recipe also calls for a baguette, so I used the rest of our mini baguettes, which were perfect for sopping up the liquid in the bowls of shrimp.  They were a little too crusty for anything else at this point, again making me determine that I need to cut the dough into 4 instead of 6.


For dessert, I didn't have time to make a cake.  I was learning how to make tamales, and since I brought a few for an extra "birthday present," I was given a pass.
Instead, we stopped by The Coffee Shop for a sampling of their cupcakes.  If this name sounds familiar to you, it's because these ladies won an episode of Food Network's Cupcake Wars.  Right next door to Joe's Farm Grill (featured on Diners, Drive-Ins, and Dives on the same channel), this place is generally hopping, and their cupcakes are incredibly popular.
I was sad that there were no red velvets left, but I picked up a good amount of the offerings:
  • Chocolate with chocolate buttercream (vegan, according to the label)
  • Lemon
  • Cherry
  • Cookie dough
  • Bubble gum - I took the guy's advice on this one, and I thought HRH might like the bright color of it, so I got two so that she could have her own.
So, after dinner, we sliced them all up (except the bubble gum one that was given to HRH in its entirety) and had a little cupcake tasting.
Honestly, I wasn't super impressed.  With the exception of the chocolate, which tasted like chocolate, the overwhelming flavor of all of the cupcakes was almond - cherry and almond, lemon and almond, bubble gum and almond, etc.  I had noticed an almond flavor when I had a red velvet cupcake a few months ago, but I figured that was a one-time occasion.  However, I guess it wasn't - with all but one of five cupcakes having this almost overpowering - if not completely overpowering, in the case of the cookie dough -  the flavor for which the cupcake was named was more than disappointing.  Almond extract is quite strong, stronger than, say, vanilla extract, so it needs to be used with caution.  And, in my opinion, not everything should taste like almond.  I was really hoping for a good lemon cupcake, so the fact that the almond outshined the lemon in both the cake and the icing made me less likely to obtain a cupcake from The Coffee Shop again.
But they sure were pretty!


Before I sign off, I don't feel that I can properly post this entry without noting the utter sadness I felt nearly the moment I left the tamale class on Saturday; I headed to the store to pick up a few things for dinner, and I immediately heard on the radio of the shooting of Congresswoman Gabrielle Giffords, federal judge John Roll, 9-year-old Christina Green, Dorthy Murray, Dorwin Stoddard, Phyllis Schneck, Gabe Zimmerman, and 12 others whose names have still been withheld.  I mourn with the families of Judge Roll and the others who lost their lives; violence is never the answer - while it may seem like a short-term solution, the consequences always - ALWAYS - outweigh any "benefit."  I pray for the recovery of Congresswoman Giffords and the others who remain in Tucson hospitals, and I am thankful for those two people - heroes - who tackled the alleged shooter before more could fall.  But we must remember to have compassion for everyone in this matter.  Everyone.  Now is not the time for judgement, and I am not in the place to judge.  My place is to have compassion for the victims AND for the alleged gunman.  Compassion will get us through this, and compassion will help prevent acts such as this in the future.