Showing posts with label Recipes. Show all posts

Tuesday, December 29, 2015

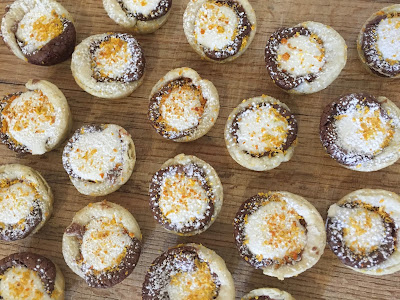
Mini Marshmallow Brownie Pies - the Marshbrowpie

Orange and chocolate are a flavor marriage made in heaven. With a buttery crust, these bite-sized delights aren't as sweet as s'mores pies made with graham crackers. And since they're made in mini muffin tins, you can grab - and eat - a handful.


Earlier this month, the Ghirardelli Chocolate Company held a social media contest. Participants simply had to make something chocolatey and yummy and use the hashtag #SweetestSecret.
After a looooooooong semester of school, work, physical therapy, and general parenting/wife-ing, I needed to relax, and an afternoon spent with Watson and Sherlock in the kitchen was definitely a great way to unwind.
Now, I am good at making exactly two things in the kitchen: marshmallows and pie. I'm terrible at cookies, have no patience to make and decorate cakes anymore, and, more than anything, I just really like marshmallows and pie.
As such, I decided to take the pie crust I had in the freezer and make mini pies. But marshmallows in pie crust? Boring. And not really a great way to feature, you know, Ghirardelli chocolate.
But marshmallows on top of a brownie that was in pie crust?
WINNER WINNER BROWNIE PIE DINNER.
Literally.
Ghirardelli liked one of my Instagram snaps so much that I was one of the winners of the contest.
How awesome is that??????????????

The winning snap!
For my "efforts" (can we really call it that if I was simply having fun in my kitchen?), I received a lovely package of Ghirardelli chocolate and baking supplies, and I'm so excited to use them all.

Clockwise, from top: Williams Sonoma cookie cutters, unsweetened cocoa powder, bittersweet chocolate, white chocolate chips, bittersweet chocolate chips, a SILPAT, Williams Sonoma stainless steel spatulas, chocolate sauce
Mini Marshmallow Brownie Pies (Marshbrowpies)
Yield: 4 dozen

  • One batch No Excuses Pie Dough (or enough of your favorite pie crust for a two-crust pie; if you don't have a favorite pie crust recipe, you do now)
  • One batch Perfect Fudge Brownies batter (or your favorite brownie recipe; this should be your favorite brownie recipe)
  • One batch triple orange marshmallows (below)

Note: you're going to have both leftover brownie batter and marshmallow cream, so follow instructions to prepare a pan for the brownies and a pan or moulds for the marshmallows. The brownies will be good snacks to give to people who for some reason don't like pie and/or marshmallows (yes, Virginia, they do exist), and the marshmallows are excellent in coffee or cocoa or as snacks for people who don't like chocolate (or are allergic to it, as some people are).


For the pie crusts:

Roll out the dough (see original post for directions). Using a cookie cutter slightly larger than the diameter of the mini muffin tin, cut out small circles. If you don't have a cutter the right size, you'll find that an average drinking glass will do the trick. Cut out a small triangle so your circle looks like PacMan. 


Using a finger dipped in cold water, seal the two sides together to make a cone shape; place into ungreased, unlined mini muffin tins.
Chill for at least thirty minutes. In the meantime, preheat your oven to 375°, and prepare the brownie batter.

For the brownies:

Prepare brownie batter according to directions. When the batter is mixed, add a teaspoonful of the batter to each of the pie crusts.


Bake at 375° for 9-10 minutes. Cool for at least ten minutes before adding the marshmallows.
Pour the remaining batter into a prepared pan, and bake for slightly less than the recommended time, checking frequently. I recommend breaking up Ghirardelli peppermint bark and sprinkling it over the batter so that you have peppermint brownies, especially yummy during this time of year.
You want the mini pie brownies to still be soft enough in the middle so that they collapse. If they do not collapse, press down the centers a bit once they cool enough to handle.

For the marshmallows:
  • 4 1/2 tablespoons powdered gelatin
  • 1 cup cold orange juice
  • 1/2 teaspoon salt
  • 1 tablespoon orange extract
  • 1 tablespoon orange zest
  • 3 cups sugar
  • 2 cups corn syrup (or rice syrup; agave nectar might also work)
  • splash orange juice
  • powdered sugar/corn starch mixture in which to toss the marshmallows
  • Additional zest, for sprinkling
Combine the juice, salt, and orange extract in the bowl of a mixer.  Sprinkle gelatin over the mixture and whisk to combine, being careful to get rid of any lumps.  Set aside.
For the extra marshmallows: spray a 9X13 pan with either pan spray or coat with oil.  Line the pan with plastic wrap, and then coat the top of the plastic wrap with oil.  Coat completely with your powdered sugar and corn starch mixture.  I've played around with how much, and what I've found works well for me is to coat completely and then tap out the excess.  This makes, for me, a less clumpy end product.  Set the pan aside.
Alternately (and this is what I've started doing since my last marshmallow post), you can use silicone moulds, making sure to spray them with either pan spray or coat them with oil. You'll need enough moulds to make approximately 60 marshmallows (this is three Wilton baking moulds or 4 Chicago Metallic marshmallow moulds).
Bring sugar, syrup, zest, and and a splash of juice to a boil.  Continue to boil until the mixture reaches 244° (the soft ball stage).  
When the syrup mixture reaches about 235°, turn on the mixer, using the whisk attachment, to low.
As soon as the syrup reaches the proper temperature, remove and pour into the mixing bowl, continuing to whisk on low.  
Gradually raise the speed of the mixer.  Continue to whip until the mixture has about tripled inside (read: you're fearful it will overflow) and it starts to come off the sides of the bowl in small threads.

To assemble marshbrowpies:
Working quickly before it sets, add the marshmallow cream to the brownie pies. 
Pour the cream into two 16" piping bags, each prepared with a tip (I use a 5). Pipe a small amount into each brownie hollow.
If you don't have piping bags, you can pour a well-oiled teaspoonful of marshmallow cream into the hollows created when the brownies collapsed. 
Either pour or pipe the leftover marshmallow cream into a prepared pan or moulds.
Lightly dust orange zest over all the marshbrowpies. Follow that by sifting the corn starch-powdered sugar combination over the top of all the marshmallows, making sure that you can't see any of the shiny mallows under the snowy powder.  Allow to sit, uncovered, for several hours or overnight.
To remove, simply use your finger or a knife to pop each one out. Remove any excess dusting powder, and sprinkle with leftover zest if you like.
These will stay in an airtight container for about a week (or however long they last before being eaten).


Of course, you could make almost any flavor of marshmallow here. I have also made these using salted caramel mallows. But I do think that the boldness of a citrus pairs so well with the chocolate that it's worth starting with.

Thanks so much to Ghirardelli for the #SweetestSecret fun, and of course for the wonderful gifts. The contest was a great way to end my semester and get back in the kitchen, and all of the goodies will be used with glee.

Disclosure: While I do use Ghirardelli chocolate for all my baking, my only "earnings" was the items that I won in this contest (all of which are pictured above). I have not been compensated for my enthusiastic use of Ghirardelli in this post or any other posts that may encourage use of their products, although I still encourage use of their products, because it's really good stuff.
Wednesday, December 23, 2015

Smoky Mountain Clusters

Mellow brown sugar marshmallows and creamy vanilla caramel sauce are the perfect accents to the smokiness of the pecans, almonds, and cashews in this homage to the pride of Nashville. This is definitely not your daddy's Goo Goo Cluster, but it's a smoky, sweet morsel that will surely cause Santa to add you to the permanent Nice List.


When I was a young pup, my dad brought home the most magical, delicious, and exotic treat from Tennessee after attending a conference in Nashville. It was a Goo Goo Cluster - a marshmallow nougat, topped with caramel and peanuts, and covered in chocolate. He also brought home a few Goo Supremes, which replaced the peanuts with pecans (it wasn't until the early 1990s that the peanut butter Goo Goo was released).
They. Were. Divine. 
So divine, in fact, I decided to leave one for Santa in lieu of the regular cookies and milk that year.
Santa appreciated it so much that he left me a note telling me how much he enjoyed the Goo Goo Cluster and how it was a rare treat for him, since (at the time) they were rarely found outside of the South.
Basically, Santa told me I was a BAMF for leaving him such a treat.
I've never forgotten how that felt.
This year, when Husband made a large batch of smoked mixed nuts for office gifts, my wheels got to turning as to how to use the leftover. It only took seven seconds for me to decide to try my hand at this favorite childhood treat and memory.
And you can bet that I'll be leaving a few of these for Santa this year, too.


Smoky Mountain Clusters
(inspired by the Tennessee original and one of my favorite candies in the world, Goo Goo Clusters)
Yield: 4 dozen*
  • 1 pint smoked nuts (you can use pre-made, like Blue Diamond)
  • 1 pint Caramel sauce (I use this recipe from Comfortably Domestic when I make caramel sauce; for this project, I added a sliced vanilla bean and its caviar to the sugar mixture and an additional Tbsp vanilla with the cream; I also cut out the salt)
  • 1 batch brown sugar vanilla marshmallows (below)
  • 2 1/2 bags Ghirardelli dark chocolate melting wafers (if you can't get these, you can sub 2 1/2 bags semi-sweet chocolate chips with a tsp coconut oil)
I recommend that you prepare the caramel sauce and the marshmallows the day before you plan to make these so they have time to set (and so you have time to clean; some people might think this is a messy project, but I prefer to think of it as creative), although you can do it all in the same day if you make the sauce and mallows early enough.

For the marshmallows:
  • 4 1/2 tablespoons powdered gelatin
  • 1 cup cold water
  • 1/2 teaspoon salt
  • 2 tablespoons vanilla extract
  • 3 cups brown sugar
  • 2 cups corn syrup (or rice syrup; agave nectar might also work)
  • splash water
  • powdered sugar/corn starch mixture in which to toss the marshmallows
Combine the water, salt, and vanilla extract in the bowl of a mixer.  Sprinkle gelatin over the mixture and whisk to combine, being careful to get rid of any lumps.  Set aside.
Spray a 9X13 pan with either pan spray or coat with oil.  Line the pan with plastic wrap, and then coat the top of the plastic wrap with oil.  Coat completely with your powdered sugar and corn starch mixture.  I've played around with how much, and what I've found works well for me is to coat completely and then tap out the excess.  This makes, for me, a less clumpy end product.  Set the pan aside.
Alternately (and this is what I've started doing since my last marshmallow post), you can use silicone moulds, making sure to spray them with either pan spray or coat them with oil. You'll need enough moulds to make 80 marshmallows (this is four Wilton baking moulds or 5 Chicago Metallic marshmallow moulds; you will have leftover mallows using either method, which are great in coffee and cocoa).
Bring sugar, syrup, and and a splash of water to a boil.  Continue to boil until the mixture reaches 244° (the soft ball stage).  
When the syrup mixture reaches about 235°, turn on the mixer, using the whisk attachment, to low.
As soon as the syrup reaches the proper temperature, remove and pour into the mixing bowl, continuing to whisk on low.  
Gradually raise the speed of the mixer.  Continue to whip until the mixture has about tripled inside (read: you're fearful it will overflow) and it starts to come off the sides of the bowl in small threads.
Using a large spatula liberally coated with pan spray or olive oil, pour the marshmallow cream into the prepared pan, carefully spreading it out evenly.  Take a pause to lick the spatula before throwing it in the sink.
If you're using moulds, pour the mixture into two 16" piping bags, each fitted with a plain tip (I used a 5, although I'd prefer a bit smaller). Pipe the marshmallow cream into each mould.
Sift the corn starch-powdered sugar combination over the top of the marshmallows, making sure that you can't see any of the shiny mallows under the snowy powder.  Allow to sit, uncovered, for several hours or overnight.
Marshmallows in moulds will be ready much sooner, although I still prefer to let them sit overnight.
Once the marshmallows are set, invert the pan over a large cutting board.  Use the plastic wrap to easily remove the marshmallows from the pan.  Using a serrated knife, cut into one inch cubes, tossing each in more corn starch and powdered sugar before storing in an airtight container for about a week (or however long the mallows last).
Marshmallows in moulds can be manually popped out; even though it might not look like it, they will retain their shape; toss in the corn starch and powdered sugar mixture before storing.
*I used moulds for this project, which is how I got 4 dozen of them; if you make the marshmallows in a large pan, your yield will likely be different.


To assemble:
Apply a tsp caramel sauce to the top of each marshmallow, and cover with smoked nuts. Pop these in the freezer while you melt the chocolate.
Melt the chocolate wafers in a double boiler over low heat (don't boil the water) until smooth.
Once the chocolate is smooth and melted, work in batches of 8-12 marshmallows at a time (keep the rest in the freezer until you're ready to coat them). Using a fork and a spoon, dip the bottom of the marshmallow into the chocolate, and then spoon chocolate over the top, ensuring that the entire marshmallow is covered. Place on a wax paper covered cookie sheet, and chill in the refrigerator for at least thirty minutes. 
Keep refrigerated; share generously.

Thursday, August 21, 2014

Horchata Marshmallows

I dream about horchata.
It may be my spirit animal drink.
I've raved before about the amazing horchata that Jeanne's husband TCP made for us during our big OKMH meet up in Houston earlier this year, and I could truly wax poetic on how drinking it basically tastes like fairies are dancing on my tongue.
It's seriously that good. Make it. You're welcome.


But instead of waxing poetic, I channeled my enthusiasm into making yet another treat inspired by this most delicious of concoctions. Because horchata ice cream just wasn't enough.
I do not regret my decision.


These marshmallows are so good that I told Husband to get the ones I didn't ship off to Kirsten (and I had to seriously think long and hard about shipping them instead of keeping/eating them) out of the house.
Which he didn't do.
So I ate them.
I do not regret my decision.


Horchata Marshmallows
adapted from Jenni Fields's Pastry Chef Online and inspired by TCP's Horchata

For the horchata starter:
  • 1 cup long-grain white rice
  • 2 1/2 cups gently boiling water
  • 1 3" Mexican cinnamon stick (canela)
For the marshmallows:
  • 4 1/2 tablespoons powdered gelatin
  • 1 cup cold horchata starter
  • 1/2 teaspoon salt
  • 1 tablespoon Mexican vanilla extract
  • 3 cups sugar
  • 2 cups corn syrup (or rice syrup; agave nectar might also work)
  • 1 tablespoon cinnamon (optional)
  • splash water
  • powdered sugar/corn starch mixture in which to toss the marshmallows
Combine the rice and boiling water in a blender (you may want to allow the water to cool just slightly before you turn it on, or things could go….awry); blend for 90 seconds. Add the canela; cover the blender jar and allow to sit on the counter overnight or up to 48 hours. Strain liquid through a fine mesh sieve (discard the rice and canela) and refrigerate until completely chilled before beginning the marshmallows.
Combine the horchata starter, salt, and vanilla extract in the bowl of a mixer.  Sprinkle gelatin over the mixture and whisk to combine, being careful to get rid of any lumps.  Set aside.
Spray a 9X13 pan with either pan spray or coat with oil (I use my Misto and olive oil).  Line the pan with plastic wrap, and then coat the top of the plastic wrap with oil.  Coat completely with your powdered sugar and corn starch mixture.  I've played around with how much, and what I've found works well for me is to coat completely and then tap out the excess.  This makes, for me, a less clumpy end product.  Set the pan aside.
Bring sugar, syrup, and cinnamon (and a splash of water) to a boil.  Continue to boil until the mixture reaches 244° (the soft ball stage).  
When the syrup mixture reaches about 235°, turn on the mixer, using the whisk attachment, to low or medium low.
As soon as the syrup reaches the proper temperature, remove and pour into the mixing bowl, continuing to whisk on low/medium low.  
Gradually raise the speed of the mixer.  Continue to whip until the mixture has about tripled inside (read: you're fearful it will overflow) and it starts to come off the sides of the bowl in small threads.
Using a large spatula liberally coated with pan spray or olive oil, pour the marshmallow cream into the prepared pan, carefully spreading it out evenly.  Take a pause to lick the spatula before throwing it in the sink.
Sift the corn starch-powdered sugar combination over the top of the marshmallows, making sure that you can't see any of the shiny mallows under the snowy powder.  Allow to sit, uncovered, for several hours or overnight.
Once the marshmallows are set, invert the pan over a large cutting board.  Use the plastic wrap to easily remove the marshmallows from the pan.  Using a serrated knife, cut into one inch cubes, tossing each in more corn starch and powdered sugar before storing in an airtight container for about a week (or however long the mallows last).


Some serving suggestions (if you want to be more refined than cramming them straight into your mouth):
  • These are excellent in coffee.
  • They would be just as excellent as a topper to Kirsten's Mayan Hot Chocolate (this would also be a great gift pairing….if you can handle giving them up).
  • They would be fantastic over ice cream.
  • Ghirardelli now makes a cinnamon crunch chocolate square that would likely be a perfect mate in a s'more.
  • I imagine they would also be great in coffee that had a splash of Frangelico. Probably. I haven't tested that theory….
However you take your mallows, I encourage you to enjoy them with friends, since friends make life sweeter than any marshmallow can.

Tuesday, July 29, 2014

Strawberry Colada Ice Cream for Ice Cream Tuesday

Since I've been unable to run, my physical activity has dropped off significantly.
I still walk Zooey fairly regularly, and I am working to do my PT exercises as much as possible. But all of this together still doesn't burn as many calories as my normal running routine.
It was only a matter of time, then, when Lack of Movement plus No Change in Caloric Intake took a toll on the waistline and the self esteem.
In an attempt to do what I can to alter the part of that equation of which I am in control, I've decided to focus efforts on lowering my refined sugar, grain, and dairy intake (the dairy reduction was more to combat headaches and migraines than anything else) as well as pay careful attention to the actual amount of food I put on my plate at each meal.
Of course, reducing one's sugar and dairy intake means reducing one's ice cream intake, and sometimes, a girl just wants her dessert.


Now, the great thing about ice cream, other than the way it tastes, is that its the fat content that gives ice cream that smooth texture. Coconut milk, which has the creamy texture that I was looking for, is also high in good fats, too, so it's a perfectly good substitute, and because the fat doesn't need to be cooked in the same way that a custard-based (read: with eggs) ice cream does, making a dairy-free ice cream was quite a simple process that only required a few ingredients.
And then, of course, fruit, because I still wanted to feel virtuous even when indulging.


Strawberry Colada Ice Cream
(dairy-free, paleo-friendly, vegan)

For the ice cream base:
  • 1 can coconut cream
  • 1 can full fat coconut milk
  • 4-6 Tbsp agave nectar (to taste)*
  • 2 large strawberries (or 4 small to medium sized ones) - this is just for color
  • 2 Tbsp vanilla extract
  • 1 Tbsp vodka (optional - this will help the ice cream from setting up too hard)
For the mix-ins:
  • 1 cup fresh strawberries, chopped
  • 1 cup pineapple, chopped (if you use canned pineapple, you can use the crushed variety; just be sure to drain it completely)
  • 2 tsp coconut oil, divided (or less - you really only need to lightly coat the pan)
  • 2 tsp agave nectar, divided (optional, if you want your mix-ins a little sweeter)
Combine coconut cream, coconut milk, agave, strawberries, and vanilla in blender, and puree until smooth. Pour through a fine mesh sieve (optional), and refrigerate overnight. I recommend using a quart jar in order to utilize vertical space.
Heat 1 tsp each coconut oil and agave a 6-inch sauté pan over medium heat; add strawberries and cook until caramelized. Cool to room temperature, and then refrigerate overnight. Repeat this for the pineapple (you could do them together, but I wanted to keep the color of the pineapple).
Churn the ice cream base according to your ice cream maker's directions. When the mixture is just about at soft serve consistency, add the strawberries and pineapple, and continue to churn until the fruit is well distributed.
Transfer mixture to a freezer-safe container; press plastic wrap down onto the surface of the ice cream, and cover with lid. Freeze for at least four hours before enjoying.

*NERD ALERT - A (not very) brief word about agave nectar: For a few years, agave nectar was seen as a "natural" alternative to sugar, being lower on the glycemic index, and as such, considered a better and even safer choice for diabetics and others who were concerned about sugar intake. However, for various scientific reasons that I won't go into here except to say that the large amount of fructose in it makes you want to eat more, even when full, agave nectar has been proven to not be a "healthier" option. I used it in this recipe because of its more neutral flavor (compared to honey or maple syrup). If the full amount suggested above (less than 7 Tbsp) is used, each serving of the finished ice cream will contain under 1 Tbsp of agave nectar, which in terms of sugar intake is slightly under the RDA for an adult (1 Tbsp has about 21 g of sugar; the RDA is 25 grams).


Today's post brings a close to a month of Ice Cream Tuesday posts for National Ice Cream Month. I hope you enjoyed reading the posts and recipes as much as I enjoyed eating them. In case you missed any, here they are:
And don't forget to check out some of the other wonderful bloggers who have participated in Ice Cream Tuesday this month; we've all had so much fun:

Tuesday, July 22, 2014

Not Princess Stephanie's Chocolate Cherry Chunk Ice Cream for Ice Cream Tuesday

HRH, like many young girls her age, loves Olivia the Pig.
We have all of the original book series by Ian Falconer as well as a few of the Nickelodeon series DVDs and the books from those series.
In fact, for her first Halloween, HRH wore an Olivia costume. She hated everything about it.
One of her favorite Nickelodeon episodes/books is "Princess for a Day, in which Olivia and Princess Stephanie of Poshtonia switch places; hilarity, naturally, ensues.


The complicating incident in this plot takes place in the local ice cream parlor, where both Olivia and Princess Stephanie enjoy some cherry chocolate chunk ice cream. Every time she reads the book or watches the episode, HRH has asked for us to make cherry chocolate chunk ice cream.
Except for the part where she's not a huge fan of cherries, this is a great idea.
So, I simply switched the main and supporting flavors, and now, she can't get enough.
Neither can I.


Imagined when making my dark chocolate orange concoction earlier this month, this ice cream combines dark chocolate, cherry puree, and chunks of both chocolate and cherries to make a rich and delicious treat that princesses and non-princesses alike will enjoy.


Not Princess Stephanie's Chocolate Cherry Chunk Ice Cream
Inspired by this recipe from Scoop Adventures

For the syrup:
  • 1/2 cup unsweetened dark cocoa powder
  • 1/2 cup granulated sugar
  • 3/4 cup cherry juice
  • 1/8 tsp salt 
  • 1 1/2 oz bittersweet chocolate, chopped
For the ice cream base:
  • 2 cups whole milk
  • 1 cup heavy cream
  • 2 egg yolks
  • 1 1/2 tsp cornstarch
  • 1/2 cup granulated sugar
  • 2 Tbsp honey
  • 2 tsp cherry extract
For the cherries:
  • 2 cups fresh sweet cherries, pitted and chopped
  • 2 Tbsp cherry vodka (you could use regular vodka if you want)
  • 1 Tbsp granulated sugar
Additional mix-in:
  • 1 cup dark chocolate chips or your favorite chocolate chunks (optional)
Combine cocoa powder, sugar, cherry juice, and salt in a small saucepan over medium heat. Heat to a boil until sugar is dissolved. Remove from heat and pour over chopped chocolate. Let sit for five minutes, and then whisk to combine fully. Set aside.
In a medium saucepan, whisk together ice cream base ingredients, and cook over medium heat, whisking constantly until boiling. Boil for ten seconds, and then immediately strain through a fine mesh strainer into the chocolate mixture. Whisk to combine fully.
Cool over an ice bath (I use a larger bowl filled with ice water) until mixture registers about 50°, and then cover and transfer to the refrigerator to cool overnight. If you don't have a ton of horizontal room in your fridge for the bowl, use two quart jars (this makes a little over one quart).
Macerate the cherries in the sugar and vodka in a covered bowl in the refrigerator overnight.
Once the ice cream mixture is completely cooled, add to your ice cream maker and churn according to directions.
When ice cream is just about at soft serve consistency, drain the cherries and add them, along with the chocolate chips/chunks, to the ice cream maker. Churn until well mixed, and then transfer the ice cream to a freezer-safe container. Press plastic wrap down on top of the mixture, cover with the lid, and freeze for at least 4-6 hours before enjoying as you watch your favorite Olivia episode.

Tuesday, July 15, 2014

For the Love of Dog: Ice Cream Tuesday Edition

I had planned a lengthy post that would highlight why I love my dog so dang much, but between work and school, with ballet camp for HRH and a migraine sandwiched in there somewhere, I'm just gonna post some cute but less than stellar quality pics of the world's greatest black and tan coonhound and boil it down to this: your dog wants to celebrate Ice Cream Month, too, and here's one way you can spoil your pup without spoiling her tummy.

"Can I just eat it already, Momma?"
"Om nom nom"
She heard Husband open the door, so she picked it up and ran so she wouldn't have to share.
Made with 99% lactose-free kefir, this is appropriate for those dogs whose tummies don't do well with wheat, which is in the popular commercial brand of doggie ice cream (or those other ingredients that you can't pronounce that you don't want to give your pup, either).

Cool-Yer-Paws Doggie Ice Cream
  • 1 large-ish sweet potato, roasted and skin removed (give your dog the skin to snack on)
  • 1 overly ripe banana
  • 32 ounces full-fat plain kefir, preferably organic
  • 1/2 cup coconut oil, melted (or, as we call it in Arizona, "room temperature")*
Combine all ingredients in a blender until smooth. Refrigerate until chilled through. Churn according to your ice cream maker's directions. Upon soft serve consistency, spoon into 1/4-cup containers and freeze until firm.

I suppose you don't need to churn it, but I wanted to give Zooey ice cream and not just a kefir-sicle, so the churning added in some air to the mixture. It has nothing to do with me maybe being a crazy dog lady.
As you can tell by the photos above, Zooey had no problem with the ice cream, unless you count having to wait for it while I took a photo.

*Coconut oil turns solid below 76°, but it doesn't fully freeze; when it's mixed with the other ingredients, it helps to keep ice crystals from forming in this ice cream so that your dog doesn't have to lick her tongue raw trying to enjoy her treat. This might sound like a lot of oil, but because even full-fat kefir doesn't have nearly the fat content that cream does, this will further help the consistency of the ice cream. The oil can help keep your dog's coat nice and shiny (it's great for itchy dogs), and the sweet potato will help keep everything moving in the right direction, if you catch my drift, while the banana makes sure it doesn't move too quickly.

Tuesday, July 8, 2014

Mr. Pineapple Brown Sugar Ice Cream with Beer Caramelized Pineapples for Ice Cream Tuesday

A few weeks ago, when I was about to churn my chocolate orange ice cream for last week's Ice Cream Tuesday post, my ice cream maker died. I had just poured my mixture into the pre-frozen base and turned it on, and it made The Most Horrible Machine Dying Sound.
And then it stopped.
And I was left with a mixture that had already started to freeze to the ice cream base and no real good way to get it OUT before having to start over.
It was panic at the disco over here.
Of course, Zooey tried to help, so that was fun. Dogs and chocolate go together so well, you know.
Thankfully, I only managed to lose about half a pint as I madly poured and scraped the mixture back out of the ice cream maker and into the quart jars from whence they came.
And then, once I cleaned that remaining half pint of mixture off the counter top, the cabinets, the floor, and me, I sat down and thought, "Crap. What do I do NOW?"
Certainly I could have made this without an ice cream maker, but after posting about this little adventure on my personal Facebook page, some close friends texted me and said I could borrow theirs for a while. They even pre-chilled the base so I could get back to where I was before Disaster struck.
So naturally, I've gone mad with power and am making All the Ice Creams.


This ice cream is a nod to a local summer favorite: San Tan Brewing Company's Mr. Pineapple wheat beer. This seasonal brew is immensely popular round these parts, and people celebrate its tapping each year like it's a national holiday (it should probably be a state holiday, at the very least). The subtle sweetness that the pineapple adds to the beer is a perfect partner to the brown sugar, and when you add in pineapples caramelized in that same beer, you have a winning combination that just might make you forget that it's 110° already.
It's worth a shot, at least.


Mr. Pineapple Brown Sugar Ice Cream With Beer Caramelized Pineapples
Ratios inspired by Jenni Fields's Pastry Chef Online Maple Buttermilk Pecan Ice Cream

  • 2 cups San Tan Brewing Company's Mr. Pineapple Wheat Beer (or other wheat beer with pineapple or other tropical fruit to it)
  • 1 cup heavy cream
  • 1 cup half and half
  • 1/2 tsp salt (I use Real Salt)
  • 14 ounces brown sugar (you could probably reduce this to about 10-12 ounces)
  • 4 egg yolks
  • 1 Tbsp cornstarch
  • 2 cups whole milk, chilled
  • 1 Tbsp vanilla
  • Beer caramelized pineapples*

Combine the beer, cream, half and half, salt,  brown sugar, egg yolks, and cornstarch in a large sauce pan. Bring to a boil, whisking constantly.
Boil for ten seconds, and then immediately strain through a fine mesh sieve into a large bowl.
Add the whole milk, which you can just bring right out of the fridge when you need it. Whisk to combine completely.
Cool over an ice bath (I use a larger bowl filled with ice water), and then cover and transfer to the refrigerator to cool overnight. To save valuable horizontal space, I recommend using two quart jars.
Once completely cooled, add to your ice cream maker and churn according to directions. In the last few minutes of churning, mix in the caramelized pineapples.
Once the ice cream has reached soft serve consistency, pour mixture into freezer safe container. Press plastic wrap onto top of mixture (don't worry; it won't freeze to it), and fasten lid before moving to the freezer. Freeze for at least four hours before enjoying.
Just a note: this makes two full quarts, so you may need to pour some out for your homies before churning; otherwise, when you add the pineapple, the ice cream will spill out of the dasher. Or, I suppose you could do this in multiple batches. It's up to you.

*To make the beer caramelized pineapples, follow this recipe from The Beeroness; I used more Mr. Pineapple instead of the saison she recommended, and it.was.amazing. Just make sure that you chill the pineapples before mixing in to the ice cream, or else they will warm the mixture up too much, and you'll be churning for a bit longer than you plan.


Common sense warning: Even though the beer is cooked and the alcohol levels thus reduced, this ice cream still contains some levels of alcohol, so it's probably not the best choice to give your kids. Which is perfectly fine; you work hard to raise those kids, and you deserve to have an ice cream all to yourself for once. Get the kids a non-boozy flavor and enjoy responsibly.

Tuesday, July 1, 2014

Dark Chocolate Orange Ice Cream for Ice Cream Tuesday: Scoop Adventures Edition

Well, we had our last double digit day for the foreseeable future a few weeks ago, so if you need me, I will be stuffing myself into the kiddie pool I bought for HRH and Zooey to share and washing down an iced tea that may or may not be of the "adult" persuasion.
Oh, and pants are pretty much optional until October.


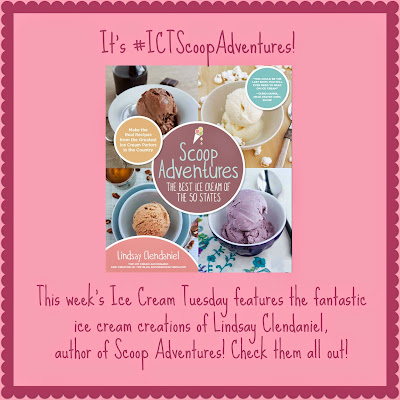
So naturally I jumped at the chance to make MOAR ICE CREAM when Jenni, our fearless leader and ice cream wrangler over at Pastry Chef Online, asked if anyone wanted to join the reindeer games for a special Ice Cream Tuesday to celebrate the publication of Scoop Adventures: The Best Ice Cream of the 50 States: Make the Real Recipes from the Greatest Ice Cream Parlors in the Country, by Lyndsay Clendaniel. Lyndsay also writes the blog Scoop Adventures, and she's a certified ice cream devotee. Her new book highlights fifty amazing - and local - ice cream shops from around the country. 


IceCreamTuesday

Fellow fans of ice cream can now get this book; you can order directly from Amazon by clicking the picture of it above. If you so choose, you can also locate a local bookstore here and order it that way.
BUT!!!!! You can also enter to win a copy of the book! The details are below, so keep reading! Excitement and exclamation points abound!
In choosing what ice cream to make, I needed to make sure that someone else in the family would eat it; once pants are back in fashion in the Philistine house in the fall, I do need to be able to fit into them, after all. Since HRH wasn't a fan of the horchata ice cream, I looked for a recipe with chocolate so that she, too, could enjoy the fruits of my labor (since she didn't actually want to participate in the "labor" portion of the exercise). Thankfully, I found this fabulous chocolate and orange dream of a recipe, and I knew I had to make it. While oranges are no longer in season, citrus is just A Part of Life in Arizona, so we usually have zest and juice of some sort in the freezer, although I did nab a fresh orange at the store to make the ice cream (right now all we have is lemon and grapefruit juices).


This ice cream is deliciously chocolatey, but the orange juice makes it refreshing at the same time. It's perfect for the kids as well as any adult ice cream love in the house. Even Husband, who eschews ice cream in favor of sorbet, said the flavor was great; he still only had one spoonful, though, so HRH and I had to power through it ourselves. It was rough.

Dark Chocolate Orange Ice Cream
gently adapted from this recipe at Scoop Adventures

For the syrup:
  • 1/2 cup unsweetened dark cocoa powder (I use Hershey's Special Dark)
  • 1/2 cup freshly brewed coffee
  • 1/2 cup granulated sugar
  • 2 tsp freshly grated orange zest
  • 1/4 cup freshly squeezed orange juice
  • 1 1/2 ounces bittersweet (70%) chocolate, chopped
  • 3 Tbsp cream cheese, room temperature
  • 1/8 tsp salt (I use Real Salt)
For the ice cream base:
  • 2 cups whole milk
  • 1 Tbsp plus 1 tsp cornstarch
  • 1 cup heavy cream
  • 1/2 cup granulated sugar
  • 2 Tbsp honey (orange blossom is a great addition here)
Combine cocoa powder, coffee, sugar, zest, and juice in a small saucepan over medium heat. Heat to a boil until sugar is dissolved. Remove from heat; add chocolate. Let the mixture stand five minutes, then whisk to combine fully. Whisk in the cream cheese and salt until smooth; set aside.
In a small bowl, whisk together 2 Tbsp of the milk with the cornstarch until it makes a slurry.
In a medium saucepan, combine the remaining milk, cream, sugar, and honey and cook over medium heat. Bring to a boil, stirring frequently, until the sugar dissolves. Remove from heat and whisk in the cornstarch slurry. Return to the heat and boil until the mixture coats the back of a spoon; this should only take a minute or so.
Pour the cream mixture into the chocolate mixture, whisking to combine.
Chill completely before churning; I recommend using two quart jars to save room in the refrigerator.
Strain through a fine sieve and pour into your ice cream maker. Churn according to your ice cream maker's directions. If you don't have an ice cream maker, check out Lyndsay's post on making ice cream without an ice cream maker.
Once the ice cream has reached soft serve consistency, pour mixture into freezer safe container. Press plastic wrap onto top of mixture (don't worry; it won't freeze to it), and fasten lid before moving to the freezer. Freeze for at least four hours before enjoying.


Now for the exciting part - the giveaway!!!! I don't normally do giveaways, since my blog is small, I had started to be more of a running blogger than a food-ing blogger, but I felt it was my duty as an ice cream lover to share this opportunity.
Here is what you have to do:
  1. Follow Scoop Adventures on Twitter (@scoopmuse); leave a comment, with your Twitter handle, telling me that you have done so.
  2. For an extra entry, leave a separate comment telling me what your favorite summer frozen treat is. Are you an ice cream sandwich person, or do you go for frozen fruit bars? Did you chase down the ice cream truck as a kid, or did you always have Otter Pops in the freezer?
The fine print: Entrants must be residents of the US or Canada who are at least 18 years of age. Twitter profiles must be public; I must be able to verify that entrants are following Scoop Adventures. This giveaway is open through 11:59 PM, Pacific Daylight Time, Tuesday, July 8, 2014. The winner will be selected by random drawing and notified by email; once the email is sent, the winner will have 48 hours to respond. If, at that time, no response has been received, a new winner will be drawn and be subject to the same parameters.

Make sure that you check out some more of Lyndsay's recipes, as made (and adapted) by these fellow frozen treat fanatics. You'll also increase your changes to win the book by entering their giveaways, too. Then go make some ice cream yourself. Feel free to wear pants if you'd prefer.
Full disclosure: As compensation for being a part of this special Ice Cream Tuesday, I received a copy of Scoop Adventures: The Best Ice Cream of the 50 States: Make the Real Recipes from the Greatest Ice Cream Parlors in the Country. While I did not use a recipe from the book for this posting, I did modify one from Lyndsay's blog. I will not receive any compensation if you choose to purchase this book through the links given above. All opinions are my own.

Tuesday, May 27, 2014

Horchata Ice Cream with Mocha Mallow Swirl for Ice Cream Tuesday: Marshmallow Madness

The first time I had horchata, I was teaching at one of the Catholic schools in downtown Phoenix. My students couldn't believe that I'd lived in Arizona for so many years without having had it, although my previous life in Washington gave me a pass for my first 18 years of life. So one morning, a student braved a uniform summons to bring me freshly made horchata.
It was one of those life-changing moments.
Since then, I had rarely found a place that had GOOD horchata.
It's amazing how one, life-changing experience can make an Anglo so picky about a Latin American drink, really.
So you can imagine my delight when, upon arrival to our OKMH weekend in Houston, Jeanne's Husband, The Complete Package (TCP), had made horchata to go along with the Mexican feast that we devoured.
Even though there were seven of us, we tried to drink it sparingly to make it last.
Then, Sunday morning, I couldn't stand it anymore.
"I'm putting horchata in my coffee."
And that was that.
Horchata has been constantly on my mind ever since I got back from Houston. There are certainly places here that make good horchata, but whenever we go out, I usually stay in my "safe" zone (read: iced tea and/or beer) for choice beverages.
And since it's getting hot, a milk-based drink doesn't always sound the most refreshing.
But you know what does?
Ice cream.
The OKMH girls and I have enjoyed doing our theme weeks, and an Ice Cream Week was on deck for….some day.  I'm not sure how the discussion began, but we latched on to the idea of having marshmallows in our ice cream and bringing Jenni from Pastry Chef Online, who is not only a magician when it comes to sweet treats but has also recently begun a weekly ice cream posting on her blog.
Kirsten promptly took the idea to Jenni, who thought it was a whiz bang idea. She brought in many more friends who love ice cream and marshmallows, and voilà - here we are.


Now, since horchata goes so well with coffee, it was clear that a coffee marshmallow creme was the perfect pairing for this Ice Cream Tuesday.
I'll be honest with you, though. This recipe nearly didn't happen. The date snuck up on me, as I'm wrapping up my school year with my own students and only recently submitted my own final exams.  Then there were the Mallow Disasters. DisasterS - as in more than one. Disaster One was a marshmallow creme that fell. Disaster Two was a batch of marshmallows that…I don't even know how to describe the utter failure of it, really. But for the record, marshmallows can separate, and it's neither pretty nor tasty.
Thankfully, Kirsten saved the day (again). She reminded me that she has a marshmallow creme recipe and that I need to actually refrigerate homemade mallow creme so it doesn't fall apart, so Attempt Number Three went According to Plan.


Between Disaster Two and Attempt Three, I decided that the color was going to be a bit lacking, as the ice cream and mallows/mallow creme were basically the same tan color, so I found a homemade chocolate syrup recipe to which I added coffee.


The end result was perfect. While the horchata is sweet, it's not overly sweet, so the addition of the mallow creme and mocha syrup adds just enough sweetness to make it toothsome without making it also tooth-decaying.


Horchata Ice Cream with Mocha Mallow Swirl
modified from Jenni Field's Maple Buttermilk Pecan Ice Cream

For the Ice Cream:

  • 1 quart plus 2 cold cups of TCP's horchata, divided
  • 1/2 tsp salt (I use Real Salt)
  • 4 egg yolks
  • 1 Tbsp cornstarch
  • Coffee marshmallow creme (see below)
  • Mocha syrup (see below)

For the Mocha Syrup:
I used this recipe from Kitchen Treaty for chocolate syrup but used dark cocoa powder (Hershey's makes a Special Dark that I like) and two packets of Starbucks Via instant coffee powder (French roast) in my measurement for the cocoa powder. You can make this in advance and stir it into just about everything you can imagine, but make sure you leave some for the ice cream.

For the Ice Cream:
Note - horchata takes some time to prepare, so if you want to have this ice cream ready for Saturday evening, start the horchata process Wednesday or Thursday, and make the ice cream base Friday. It's a long wait but not very time consuming (lots of "chill overnight" steps), but it's so worth it.
In large pot, combine 1 quart horchata, salt, egg yolks, and cornstarch. Bring to a boil, whisking constantly.
*If you would prefer a sweeter end result, you could add 1/4-1/3 cup brown sugar, but really, I don't think it's necessary once everything is put together
Boil for ten seconds, and then immediately strain through a fine mesh sieve into a large bowl.
Add the remaining 2 cups horchata, which you can just bring right out of the fridge when you need it. Whisk to combine completely.
Cool over an ice bath (I use a larger bowl filled with ice water), and then cover and transfer to the refrigerator to cool overnight. If you don't have a ton of horizontal room in your fridge for the bowl, use two quart jars.
Once completely cooled, add to your ice cream maker and churn according to directions.
**Horchata is made with different kinds of milk, so this ice cream won't be as thick and creamy as other ice creams that are made with half and half or heavy cream (although that's not to say that it's not at all creamy). If you plan to make it only for ice cream purposes, you may want to use half and half instead of the whole milk in TCP's recipe, but I'm not sure I want to drink it that way; it's thick enough as a beverage. You could also use half-horchata, half cream for the custard mixture, although that would make the horchata flavor a bit more subtle (which I guess would be OK). Since it will have a lower fat content than most ice creams, it will freeze a little harder. That's not a big deal here in Arizona, but you may want to take some measures to ensure a more scoopable texture in your area.

For the Marshmallow Creme:
I used Kirsten's marshmallow creme recipe, adding one packet of the Starbucks Via instant coffee powder to the egg whites.
I highly recommend making this while the ice cream is churning, as you'll have plenty of time, and you can begin to assemble immediately after the creme is finished.

To Assemble:
Once the ice cream is at a soft serve consistency, drizzle a few tablespoons of the mocha syrup onto the bottom of a freezer-safe container. Add a few dollops of the mallow creme (I suppose you could use a piping bag, but I'd already made enough of a mess). Cover with ice cream. Repeat the process until you've used up all the ice cream. Press down plastic wrap onto the ice cream, cover with the lid, and freeze for at least 6 hours.

To Serve:
Now, you could sneak a few spoonfuls of this ice cream straight from the freezer (What? Like that's NEVER occurred to you….), and that would be delicious.


But to combat the heat of summer, which is already upon us here in Arizona, I highly recommend that you scoop it into a bowl, ladle a little more mocha syrup, and then slap a big ol' spoonful (or two) of mallow creme on top before calling it a dessert.

Now, like I said, Jenni enlisted several friends to participate in today's Ice Cream Tuesday, so if you like to choose your ice cream from those places that have more than 30 flavors, take some time to peruse all of the recipes we have to offer before you start churning on your own:
Summer and its hot days filled with cold ice cream are nearly upon us - so tell me: what flavor are you craving?

Wednesday, December 11, 2013

The 2013 Great Food Blogger Cookie Swap

Cookies, I have decided, are NOT my forte.  While I love me a good chocolate chip with milk, my cookie baking karma isn't quite up to snuff.  I'm not sure if my oven isn't properly calibrated (it's possible) or it's just too warm/dry here in Arizona (also possible), but my cookie-making prowess isn't even a tenth of what I'd like it to be.
Even in the face of my cookineptitude (I also love me a good portmanteau), I boldly signed up for this year's Great Food Blogger Cookie Swap (this is its third year).  Why did I do it?  Because I'm crazy each year, the cookie swap raises and donates money to Cookies for Kids Cancer, an amazing organization that raises money for research and new treatments for pediatric cancer.  You may know that different cancers require different treatments, but what you may not know is that many oncology treatments are not considered appropriate or safe for children.  Testing is "iffy" (I think that's the technical term), since medical testing on children is, well, horrifying to some and considered unethical by just about everyone.  As such, developing appropriate treatments is difficult and often more expensive.  And while I rage against the colon cancer that took my dad, I'm often brought to my knees at how pediatric cancer has affected my life, even if not as dramatically.  My dear friend Kirsten lost her sister to cancer; Lily, my friend Alicia's daughter, lost her battle last December, and my husband's baby brother fought (and has won, so far) two rounds of non-Hodgkins lymphoma.  Losing a parent to cancer is awful, heinous, and vile.  Losing a child to cancer, well, I haven't found any words that could bring justice to it.
And being armed as such, with no words to comfort those who have lost their children and siblings and friends to pediatric cancers, I happily tied my apron and failed gloriously at my first attempt at the cookies I was to send out for this year's cookie swap.
So I went to the store, bought more butter, and failed again at a completely. different. recipe.
Good cause or not, at that point, I was ready to break things.  And yes, I cried.  I was actually this close:  | |  to running back to the store for some pre-made, preservative-filled slice and bake... things.
But instead, I took a deep breath, double checked the recipe, made some modifications, and managed a cookie that was tasty and (sort of) pretty.
And then I shipped them off, swearing I'd never make cookies ever again.

So here's the deal.  The Great Food Blogger Cookie Swap is kind of a round robin, pay it forward, secret Santa situation.  Each participant is given the names and addresses of three other participants, but everyone is sworn to secrecy as to who sends to whom (while this wasn't a big deal for me, since I have never known the people to whom I send my cookies, it's possible in food blogging circles that the participants know each other).  But the three people to whom I sent my cookies were not the same people from whom I received cookies.
Am I making sense?
I didn't think so.
Really, the only thing you need to know is that you reap what you sow - send three packages of cookies out (a dozen each), and you shall receive three packages in return.

We won't discuss the first recipe I attempted.  But that's OK.  The cookie I finally ended up with was, I think, a much better idea at the end of the day anyway.
Now that I've made mustard, ice cream, and pie with beer, it was time to move on to the cookie.  Beer is great with cookies.  In fact, the brewery whose beer I used for this recipe serves its seasonal Winter Warmer with gingersnaps.  So what better ingredient to add to a cookie recipe?  Using a winter seasonal offers a taste of the holiday season without being smacked in the face with it (I'm looking at you, craft stores selling cinnamon-scented pine cones).  For the flavor to really come through, don't worry about adding any additional spices.  You'll still be able to taste them all.  Trust me.
But just in case, you'd better pour yourself a beer.

Winter Spiced Ale and Brown Sugar Cookies
Adapted from The Beeroness

  • 12 Tbsp unsalted butter, softened (but not too soft)
  • 1 1/2 c dark brown sugar (you can use light, but I prefer the darker, mostly for color)
  • 1 large egg yolk, room temperature
  • 1/2 tsp vanilla
  • 1/3 c winter seasonal spiced ale (I used San Tan Brewing Company's Rail Slide Imperial Spiced Ale; if you can't get Rail Slide near you, I'm really sorry, but I'm sure your local craft beer place has a great winter seasonal as well)
  • 1 1/4 c all purpose flour
  • 1 c bread flour
  • 1 1/4 tsp baking soda
  • 1/2 tsp salt
  • 1 tsp corn starch

**The original recipe calls for baking powder as well.  I tried with and without the baking powder, and it made a huge difference in my cookies not spreading and turning into one super-cookie during the baking process, so if you have an unpredictable oven or, like me, bad baking karma, I recommend that you also omit it.


In a large, non-reactive bowl, combine flours, baking soda, salt, and cornstarch.  Set aside.
In the bowl of a stand mixer fitted with the paddle attachment, cream the butter and brown sugar on low speed until just combined. Add the egg yolk and vanilla.  Add the beer and beat until just combined.
Add the flour mixture to the beer mixture and combine, scraping down the sides of the bowl as necessary.  Do not over-mix.
Using a cookie scoop, a melon baller, or a spoon, scoop out balls of dough (smaller than a golf ball but larger than a marble) and place onto parchment paper-covered cookies sheets (or, if you're all fancy, use Sil-Pat; I am not fancy).
Chill at least a half hour.
Preheat the oven to 325°.  Take cookies from the refrigerator directly to the oven and back for 7-8 minutes, or until the edges just start to brown.
Place the cookies on a cooling rack immediately to cool.

And off they, went, to their new homes!

Just kidding - I did actually pack them in pretty tins.
These ale cookies went to:
Guten Appetit, ladies - I hope you enjoyed them, with or without a pint!  Check out their blogs, too, to see where their goodies ended up going!

Of course, while I do subscribe to the "it's better to give than to receive" policy, it was exciting to check the mailbox this month, knowing that I'd be having a snack shortly thereafter (HRH was pretty excited about that, too, and she was crushed when I told her that it would happen a mere three times).

Thanks to Melissa at Treats with a Twist for her white chocolate-dipped cranberry walnut macaroons, Zainab at Blahnik Baker for her soft and chewy butterscotch gingersnaps (or as Husband says, buttah-scotch), and Monique at Ambitious Kitchen for her white chocolate, cherry, and macadamia nut oatmeal cookies.  All three Philistines devoured them, and HRH even found a new love for coconut (in cookie form, at least), while Husband was thrilled to have a chewy gingersnap ("I just don't like crunchy cookies").  And even though HRH is sad that the cookies in the mail have come to an end, it's probably a good thing for my waistline that they did, for who can resist freshly baked cookies, delivered to your door (not me, that's certain)???

A big shout out goes to all of the participants (and even some who couldn't participate but who donated anyway) in this year's Great Food Blogger Cookies Swap; together, we have raised $13,778.40 for Cookies for Kids Cancer.  My heart is full that so many people wanted to not only share their delicious cookies but also make a difference for those who are engaged in a battle that they, unlike me, do not have the luxury of failing.  If you have ever doubted that people are truly kind in nature, just take this into consideration.
Thank you, too, to this year's sponsors, OXO, Dixie Crystals, Gold Medal Flour, and Grandma's Molasses, and to Lyndsay of Love and Olive Oil and Julie of The Little Kitchen for once again planning this incredible event.
If you'd like the chance to sign up for the next cookie swap, you can add you name to the list here.
A link that gives a list of all the participants and their recipes will be added soon.

Full disclosure: I did receive some awesome OXO spatulas as a gift for my participation in the cookie swap, but as this little blog is a mere hobby of mine, I wasn't asked to give my opinion on any of the aforementioned brands or of the spatulas.  I didn't specifically use the brands (I've actually NEVER used molasses), and aside from OXO, I can't personally vouch for their quality (I have several OXO products, and so I was pretty stoked to receive the spatulas; also, I love the word spatula and wanted to see how many times I could use it in a blog post).  However, I thank them all of my own accord for not shirking their corporate and civic responsibilities and for using their brands to make a positive difference in the lives of children.

One more thing - if you also love the word spatula, this is for you: